Having written about a few things I make or use and tips & tricks a few years ago I thought do should do an update.
Blackout
Although I find that
for 99% of my fishing a red or yellow bristle on my pole floats is
fine there are those rare occasions when a black tip will show up
better. But I find it annoying when the sun shifts, clouds appear or
something else changes and the black may not then be the right
colour. Obviously the simple answer is to have two rigs made up with
different colour bristles. This though is possibly not practical or
something that someone with a limited number of topkits can do.
My simple answer is to
only black the top half of the bristle. This means the base colour
can still be seen if you remove some shot and thus more bristle is
out of the water.

Despite having more bristle out of the water when the red is showing this does not affect bites as you are looking to react when the red disappears, not the whole bristle.
Too Many Expanders?
How many of us are
guilty of preparing too many expanders for a day's fishing? OK, I
know you can argue that they don't cost much and I admit to being,
let's say prudent with money. But I hate waste. So I sorted out a
simple method to prepare enough but no too many for a session.
Elsewhere ( http://neilofthenene.blogspot.com/2014_06_01_archive.html) I explain
that I prepare my expanders at home in batches, with gelatine and
keep them in the freezer. I have worked out that 50 expanders, of
one size, are plenty for a day's fishing, sometimes even two. Though
I always take a full pot to matches (just in case I have a stellar day), leftovers get re-frozen for
pleasure sessions.
Counting out pellets
each time you want to prepare some is a pain. So I stole an idea
from The Boss's occasional job as a dispenser of medicines,
specifically pills. Dispensers use a triangular tray marked so that
without counting you know how many pills are on the tray. I just
used an old cereal box, cut the corner out to produce a triangular
tray with a lip round two sides. I then counted out 50 four mil
expanders and arranged them in a one layer quadrant in the corner of
the tray and drew a line around. I did the same with 6mils.

This means that when filled to the appropriate line, one layer deep, I know I have 50 pellets.

For Summer I will take
50 each of 4 & 6 mil as a mixture in one tub. Winter it will be
2s & 4s.
Spring Clamp
One of the odd
non-angling things I carry is a 4 ½ inch spring clamp. Cheap as
chips from Wilkinsons and has a few uses. Its main use is as a rod
rest either on the edge of a platform, bucket or even top of a
keepnet.
As I don't use a
footplate or feeder arm I needed something simple to carry that would
enable the rod to rest up against and realised this style of clamp
fitted the bill. I always have my bucket with me, I find it useful
for carrying odd bits and pieces and throwing things like litter
into. The clamp sits on the edge of the bucket most of the time so
it is easily to hand.
The pictures below show
how I use it. And just for interest I have also included a picture
showing how I occasionally use a pair of pole over/under rests for a
feeder rod.

Note my watch under the rod, I talk about that later.

Freezing Maggots
I only use dead maggots
on the hook and so don't freeze in large numbers. The following is
about what I do to get a good result when defrosting.
People sometimes
complain about their defrosted maggots turning black quickly. To
understand why that happens I need to explain a bit of the science of
freezing. Essentially you are freezing the water in whatever it is
you are freezing. The slower the freezing process the larger the ice
crystals that will form, the opposite of course being that faster
equals smaller crystals. Large crystals destroy the internal
structures of whatever you are freezing, small crystals do less
damage. This is why you cannot normally freeze strawberries
successfully in a home freezer.
If it takes too long
for our maggots to freeze then their internal structures will be
destroyed by the large ice crystals that will form and thus turn
black on defrosting. The answer to successfully freezing maggots is
therefore to get them to freeze quickly. To achieve that I do two
things.
First is to freeze in
small batches and by that I mean enough for a day's hookbait so in
volume terms no more than 100mil. Second is to use either the fast
freeze drawer if your freezer has one or place the maggots directly
on the coolant channels at the bottom of the freezer.
This way I have never
had maggots go black and I don't need to store them in water on my
side tray. In fact I will re-freeze the leftovers and they are fine
for another session.
I used to put my
“daypack” of maggots in small foodbags. Then I realised that the
small pots I get mayonnaise in when I order a pizza are the ideal
size for a day's fishing.
Right Feeder?
I fished a match a
couple of days before writing this and it demonstrated, to good
effect, the advice about feeders I was intending to write.
I have noticed on more
than a few occasions how using the right feeder can make a huge
difference to your catch. In the match I fished I started on a
hybrid feeder and had no bites. I switched to a pellet feeder and
had one fish. I then tried a banjo feeder and that transformed my
match. I started to pick up fish regularly and clawed my way to
third. Had I stubbornly stuck to one type of feeder I doubt I would
have framed.
So to me it is
important to carry a range of feeders both in size and type and be
prepared to switch around if you are not catching.
The easiest way to do
this is have two feeder rods. You can be changing feeder on one
while the other is in the water. In one of my other blog posts I
have described my quick change system (http://neilofthenene.blogspot.com/2014/11/tips-tricks-hints.html) or you can invest in one of the
now readily available systems from the major manufacturers. Changing
feeders or even to a straight lead takes less than a minute and is
well worth the effort.
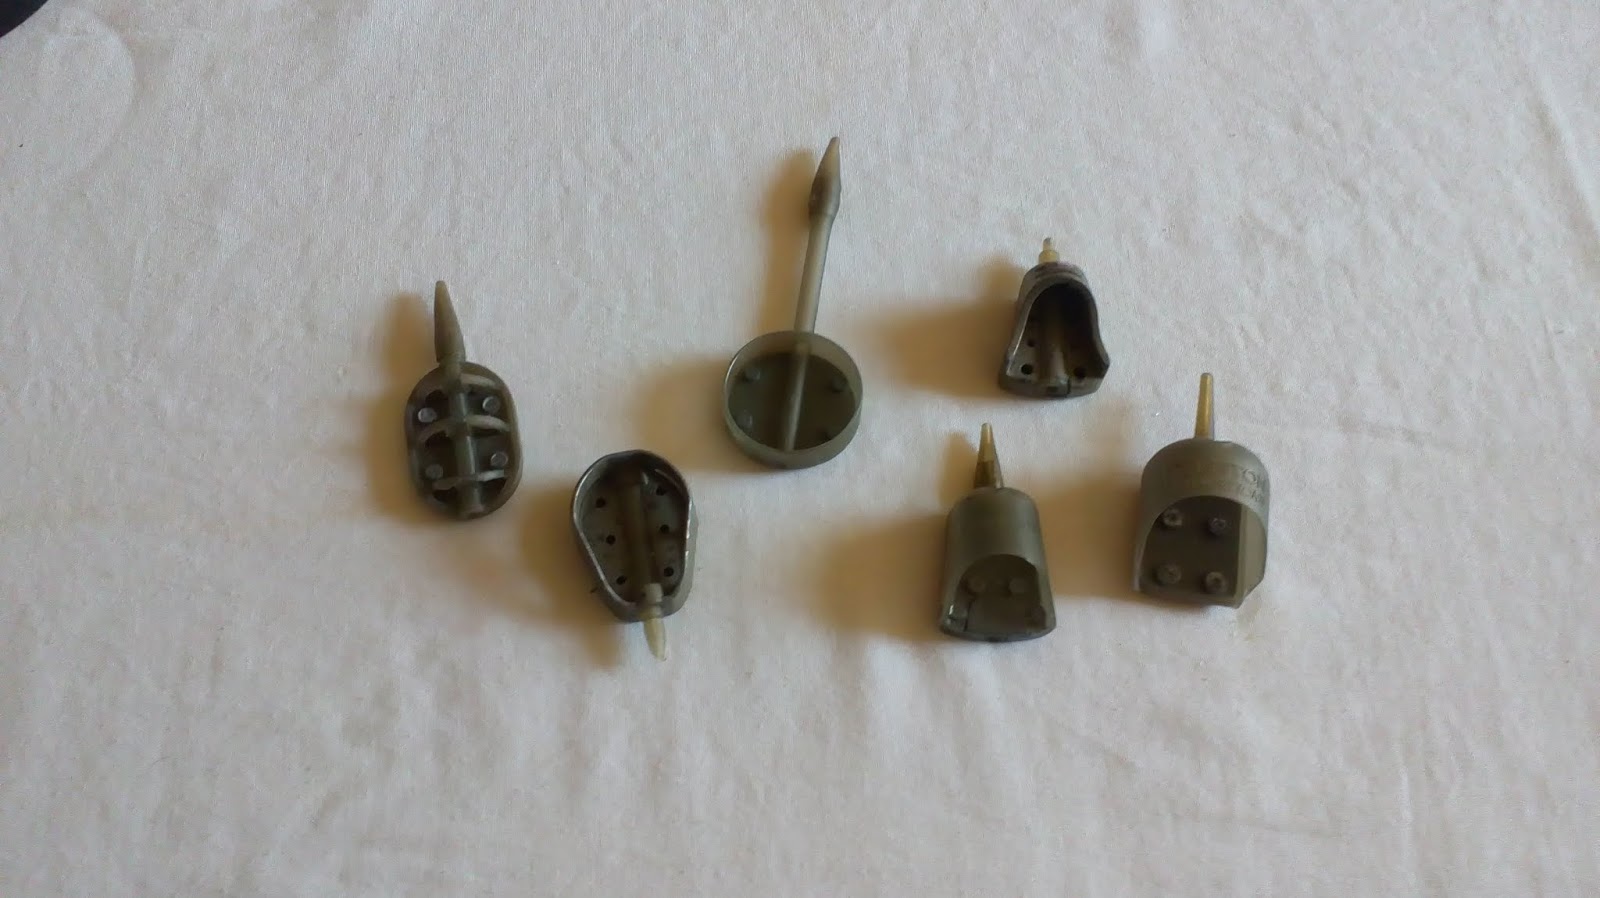
These are the range of feeders I have in my box at the moment. I really need to get the other two sizes of hybrid feeders. Of course really dedicated feeder anglers will carry a wider selection.
Right Time?
Continuing on the
legering theme. I always time my leger casts as demonstrated in the
earlier picture and having recently heard Steve Ringer (feeder World
Champion) say he does the same. Not only do I then know how long my
feeder has been in the water but I can also spot if bites come after
a particular length of time. For example, in the match I referred to
above bites were coming at around four minutes after casting.
Why is knowing this
important? In that match I knew I was wasting time if I had not had
a bite after five minutes. It was more efficient to re-cast after
five minutes and get a bite some nine to ten minutes after the first
cast rather than leave the first cast out biteless for fifteen
minutes. If I had not had a bite in this time I had to suspect
something was wrong with the feeder or hookbait preventing a bite, so
best to re-cast rather than fish on with a poorly presented bait.
Once you have
established if there is a timing pattern to your bites you can adjust
your casting frequency accordingly. Similarly, if the water has a
strong tow then it is pointless fishing beyond five minutes as the
groundbait or pellets will have been washed away from your hookbait.
In Winter I like to leave the first couple of casts fifteen minutes and often find bites come between 12 & 14 minutes. But time seems to
drag for me when legering and I can quite easily think that a real
elapsed time of five minutes feels like 15. By using a watch I can
leave the cast for a true 15 minutes before recasting.
Shot Stopper
I became frustrated
with my Stotz holder sliding around in my seatbox drawer and somehow always ending up at
the back of the drawer. I came up with a simple solution.
From eBay I got a
length of self adhesive flexible magnetic strip. By sticking one
part to two sides of the box in a corner and another two to the Stotz
holder the holder now stays in place unless I want to remove it.
I did find the original adhesive didn't do the job and so both sets of strips on the holder and drawer have been superglued in place. This stuff comes in various widths, I would recommend something around 12mm. This gives a stronger hold between the two strips than the thinner 10mm version.
Also be careful when fitting. The strips, if lined up against each other can offset slightly due to the arrangement of the magnetic poles in the strip. So I glued one strip to the Stotz holder then offered up the strip that would go on the drawer, got that positioned correctly then with the strips sticking together on the holder applied the glue and used the holder to press the drawer strips into place. This gives a perfect alignment and the strongest attraction between the two strips.

