A recent online discussion regarding flat or lollipop floats together with my own rediscovery of river fishing using these has prompted me to write on the subject.
Flat floats were designed specifically for fishing a flowing water, that could be a river or canal that flows. I think originally conceived on the continent to me they are one of the best recent angling inventions alongside Baitrunner reels and Stotz.
The picture on the left shows the float's profile in the direction of the flow. The picture on the right shows the side on view. Other designs of flat float are various shapes but follow the same basic design idea of having a slim profile against the flow.
The flat float is
really a pole equivalent of the stick float. Both are designed to
fish in and combat the effects of flowing water. And indeed there is
no reason why either float should not be used on pole or rod. I came
third in my first ever match on the river Trent (Winthorpe) fishing a
stick float on my then state of the art 7m fibreglass telescopic
pole. The benefit of the pole and flat float is that you can fish
much further out with a pole than a rod.
The Science Behind
the Design
To understand the
logic, and theory behind the flat float I will need to go over some
science.
I think most anglers
understand that the very bottom layers of the flow in a river are
slower than the surface, but by how much? Experimentation has shown
that a river's average flow occurs at 0.6 of its depth at any given
point. Thus if the river is ten foot deep then the average flow will
be six foot below the surface, and for a five foot deep river it will
be at three foot deep. As the river shallows towards each bank this
average point too gets shallower but remains at 0.6 of the depth.
In practical terms this
means that in our ten foot deep river the flow in the bottom four
feet of water will be at least 50% slower than the water on the
surface. And towards the very bottom will be slower still. It is
this major difference that the flat float was designed to combat.
I think we can safely assume that our
optimum catching potential will occur when we match the bait's speed
to the flow at whatever depth we are presenting that bait. Though
fish show signs of not be logical at times and will take a bait when
it is moving faster than the flow or is even stationary in it. This
is where the angler's skill and ability to read what is happening
comes to the fore.
Assuming though that
our aim is to present a bait as near to the natural flow rate as
possible then for me the flat float is the ideal tool.
The design is obvious
in its intention. To provide a minimal amount of cross section area
to the flow while carrying enough weight to combat the higher flow
rate in the top 60% of the depth. Hence the shape and the necessity
to carry a heavy load, up to 50 grammes (2 ounces) or more in some
cases. Some of the larger floats have shoulders to utilise the flow
to push and hold the float underwater.
To carry the same
loading a normal bodied float would need to have a comparatively huge
cross section presented to the flow and this would cause problems in
float control and reading of bites. In turn this may mean that a
normal float might need to carry a much bigger loading than a flat
float to achieve the same degree of sensitivity and presentation.
Stick floats attempted to overcome this by using a heavy wood in the
bottom half such as lignum vitae or even metal stems.
Shotting &
Hooklength
I prefer to use an
olivette that is in the region of three quarters of the float's
stated loading. So a 0.7 or 0.75g olivette would go on a 1g float.
This gives me enough spare capacity to lock the Olivette (inline),
droppers and spare shot to add to the droppers if I feel it
necessary. To start with I will place the olivette a foot above my
hooklength and then add two No.8 droppers below that. The remaining
shot will be added around the olivette but with more below than
above. These spares can be slid down to increase the weight of the
droppers.
I will also seek to
overshot the float on the day so that it has to be held back for the
bristle to show above the surface. Different flow rates will dictate
a difference in the amount you need to overshot.
My hooklength is ten
inches. This allows me to go nearly that much overdepth if required.
A longer hooklength may, at times, be useful.
Fishing the Float
The ideal I am trying
to achieve is to have the float bristle vertical while the float is
held stationary. This tells me the bulk shotting, the olivette, is
just about directly beneath the float and in turn indicates that the
bait should be near the bottom and ahead of the float. The following
diagram shows what I mean.
The diagram also shows
what could be or is happening underwater when the bristle is not
vertical.
If the bristle is not
at or near vertical but leaning back towards the rod/pole when held
back then a heavier float is required. Really only trial and error
will tell you how heavy a float you need on your local river for
different conditions. On the river Nene I use a 1 or 2g float. In
times of flood I may need heavier, but then I wouldn't be fishing the
river.
Once I am happy that
the float is fishing as I wish then I can start to experiment on
exactly how the fish want the bait presented. For those that have
fished a stick float then the process is much the same with a flat
float. The float can be held hard back in one position, the very
bottom layers may be almost stationary and thus the fish are picking
up static feed and bait. The float may need to be inched through
such that if the bottom layer of water is moving slowly the bait is
matching it. I may let the float run so that it sinks then
reappears as the olivette catches it up and the line below runs
through and gets ahead. A combination of all three should see the
angler getting indications as to which is best on the day or even in
that hour.
Bites can be any
indication on the float, a dip, lift or stopping if running through. Lift into any change in the float's behaviour.
Storage
You may wonder how to store flat floats as they will not sit neatly on a winder. The solution is to attach the float by way of four pieces of silicone tubing and not thread the line through the float's eye. That way the rig minus float can be stored on marked winders and the floats in a suitable storage box. For my 1 & 2g floats I use an old videocassette case.
Doing this can also aid changing floats if light conditions change and demand a different colour bristle. I have red, yellow & black bristled versions.
It is also worth using more line on the rig than you would for a Stillwater. You may want as much as six foot of line, possibly even more, so that the float can be run a fair distance down your swim.
Acknowledgement
I have to thank various others from whom I have picked up hints and tips on these floats, particularly storing them. My main source is
Having written about a
few things I make or use and tips & tricks a few years ago I
thought do should do an update.
Blackout
Although I find that
for 99% of my fishing a red or yellow bristle on my pole floats is
fine there are those rare occasions when a black tip will show up
better. But I find it annoying when the sun shifts, clouds appear or
something else changes and the black may not then be the right
colour. Obviously the simple answer is to have two rigs made up with
different colour bristles. This though is possibly not practical or
something that someone with a limited number of topkits can do.
My simple answer is to
only black the top half of the bristle. This means the base colour
can still be seen if you remove some shot and thus more bristle is
out of the water.
Despite having more bristle out of the water when the red is showing this does not affect bites as you are looking to react when the red disappears, not the whole bristle.
Too Many Expanders?
How many of us are
guilty of preparing too many expanders for a day's fishing? OK, I
know you can argue that they don't cost much and I admit to being,
let's say prudent with money. But I hate waste. So I sorted out a
simple method to prepare enough but no too many for a session.
Elsewhere ( http://neilofthenene.blogspot.com/2014_06_01_archive.html) I explain
that I prepare my expanders at home in batches, with gelatine and
keep them in the freezer. I have worked out that 50 expanders, of
one size, are plenty for a day's fishing, sometimes even two. Though
I always take a full pot to matches (just in case I have a stellar day), leftovers get re-frozen for
pleasure sessions.
Counting out pellets
each time you want to prepare some is a pain. So I stole an idea
from The Boss's occasional job as a dispenser of medicines,
specifically pills. Dispensers use a triangular tray marked so that
without counting you know how many pills are on the tray. I just
used an old cereal box, cut the corner out to produce a triangular
tray with a lip round two sides. I then counted out 50 four mil
expanders and arranged them in a one layer quadrant in the corner of
the tray and drew a line around. I did the same with 6mils.
This means that when filled to the appropriate line, one layer deep, I know I have 50 pellets.
For Summer I will take
50 each of 4 & 6 mil as a mixture in one tub. Winter it will be
2s & 4s.
Spring Clamp
One of the odd
non-angling things I carry is a 4 ½ inch spring clamp. Cheap as
chips from Wilkinsons and has a few uses. Its main use is as a rod
rest either on the edge of a platform, bucket or even top of a
keepnet.
As I don't use a
footplate or feeder arm I needed something simple to carry that would
enable the rod to rest up against and realised this style of clamp
fitted the bill. I always have my bucket with me, I find it useful
for carrying odd bits and pieces and throwing things like litter
into. The clamp sits on the edge of the bucket most of the time so
it is easily to hand.
The pictures below show
how I use it. And just for interest I have also included a picture
showing how I occasionally use a pair of pole over/under rests for a
feeder rod.
Note my watch under the rod, I talk about that later.
Freezing Maggots
I only use dead maggots
on the hook and so don't freeze in large numbers. The following is
about what I do to get a good result when defrosting.
People sometimes
complain about their defrosted maggots turning black quickly. To
understand why that happens I need to explain a bit of the science of
freezing. Essentially you are freezing the water in whatever it is
you are freezing. The slower the freezing process the larger the ice
crystals that will form, the opposite of course being that faster
equals smaller crystals. Large crystals destroy the internal
structures of whatever you are freezing, small crystals do less
damage. This is why you cannot normally freeze strawberries
successfully in a home freezer.
If it takes too long
for our maggots to freeze then their internal structures will be
destroyed by the large ice crystals that will form and thus turn
black on defrosting. The answer to successfully freezing maggots is
therefore to get them to freeze quickly. To achieve that I do two
things.
First is to freeze in
small batches and by that I mean enough for a day's hookbait so in
volume terms no more than 100mil. Second is to use either the fast
freeze drawer if your freezer has one or place the maggots directly
on the coolant channels at the bottom of the freezer.
This way I have never
had maggots go black and I don't need to store them in water on my
side tray. In fact I will re-freeze the leftovers and they are fine
for another session.
I used to put my
“daypack” of maggots in small foodbags. Then I realised that the
small pots I get mayonnaise in when I order a pizza are the ideal
size for a day's fishing.
Right Feeder?
I fished a match a
couple of days before writing this and it demonstrated, to good
effect, the advice about feeders I was intending to write.
I have noticed on more
than a few occasions how using the right feeder can make a huge
difference to your catch. In the match I fished I started on a
hybrid feeder and had no bites. I switched to a pellet feeder and
had one fish. I then tried a banjo feeder and that transformed my
match. I started to pick up fish regularly and clawed my way to
third. Had I stubbornly stuck to one type of feeder I doubt I would
have framed.
So to me it is
important to carry a range of feeders both in size and type and be
prepared to switch around if you are not catching.
The easiest way to do
this is have two feeder rods. You can be changing feeder on one
while the other is in the water. In one of my other blog posts I
have described my quick change system (http://neilofthenene.blogspot.com/2014/11/tips-tricks-hints.html) or you can invest in one of the
now readily available systems from the major manufacturers. Changing
feeders or even to a straight lead takes less than a minute and is
well worth the effort.
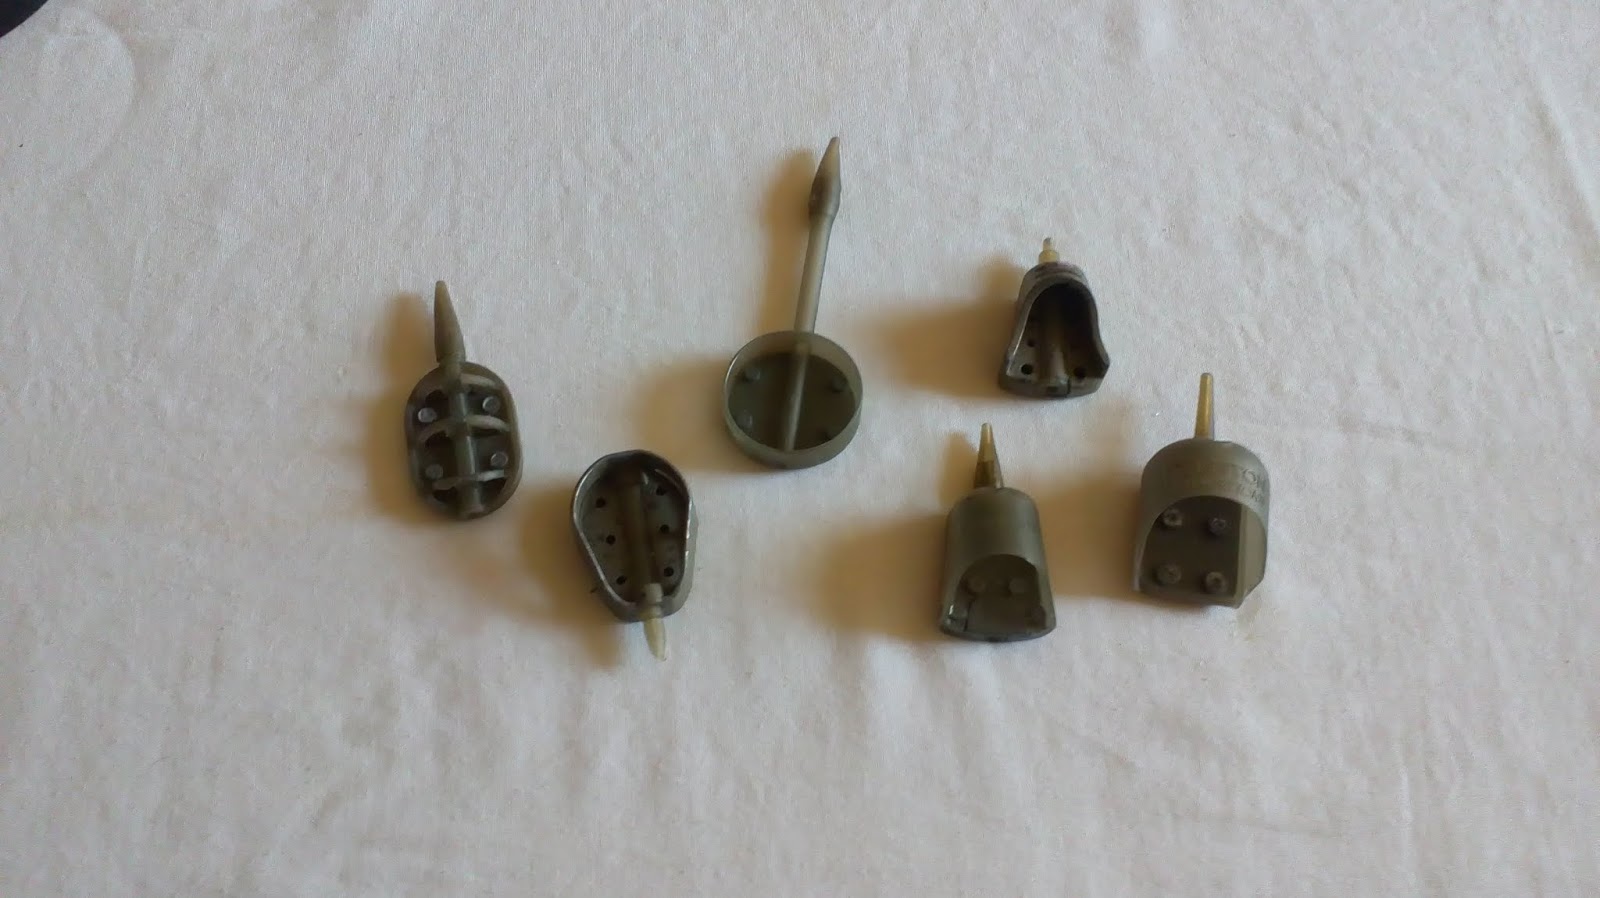
These are the range of feeders I have in my box at the moment. I really need to get the other two sizes of hybrid feeders. Of course really dedicated feeder anglers will carry a wider selection.
Right Time?
Continuing on the
legering theme. I always time my leger casts as demonstrated in the
earlier picture and having recently heard Steve Ringer (feeder World
Champion) say he does the same. Not only do I then know how long my
feeder has been in the water but I can also spot if bites come after
a particular length of time. For example, in the match I referred to
above bites were coming at around four minutes after casting.
Why is knowing this
important? In that match I knew I was wasting time if I had not had
a bite after five minutes. It was more efficient to re-cast after
five minutes and get a bite some nine to ten minutes after the first
cast rather than leave the first cast out biteless for fifteen
minutes. If I had not had a bite in this time I had to suspect
something was wrong with the feeder or hookbait preventing a bite, so
best to re-cast rather than fish on with a poorly presented bait.
Once you have
established if there is a timing pattern to your bites you can adjust
your casting frequency accordingly. Similarly, if the water has a
strong tow then it is pointless fishing beyond five minutes as the
groundbait or pellets will have been washed away from your hookbait.
In Winter I like to leave the first couple of casts fifteen minutes and often find bites come between 12 & 14 minutes. But time seems to
drag for me when legering and I can quite easily think that a real
elapsed time of five minutes feels like 15. By using a watch I can
leave the cast for a true 15 minutes before recasting.
Shot Stopper
I became frustrated
with my Stotz holder sliding around in my seatbox drawer and somehow always ending up at
the back of the drawer. I came up with a simple solution.
From eBay I got a
length of self adhesive flexible magnetic strip. By sticking one
part to two sides of the box in a corner and another two to the Stotz
holder the holder now stays in place unless I want to remove it.
I did find the original adhesive didn't do the job and so both sets of strips on the holder and drawer have been superglued in place. This stuff comes in various widths, I would recommend something around 12mm. This gives a stronger hold between the two strips than the thinner 10mm version.
Also be careful when fitting. The strips, if lined up against each other can offset slightly due to the arrangement of the magnetic poles in the strip. So I glued one strip to the Stotz holder then offered up the strip that would go on the drawer, got that positioned correctly then with the strips sticking together on the holder applied the glue and used the holder to press the drawer strips into place. This gives a perfect alignment and the strongest attraction between the two strips.
I realise that many
anglers find fishing in the Winter months difficult due to the cold.
But for those wishing to get out I thought I would offer my insights
into staying comfortable when on the bank. And where possible, not
having to spend a lot doing so. But you cannot cut corners on some of the gear you need.
Personally I have no
difficulty in fishing in the depths of Winter and actually enjoy
breaking the ice on the canal and then catching without the nuisance
of boats. Similarly rain does not bother me either. With the right
clothing and accessories you can have a comfortable day. But so many
Winter days are dry, calm and sunny that you don't have to brave the
worst weather in order to go fishing in Winter.
I must mention here
that I have not used an umbrella for several years. I just got tired
of it getting in the way, water dripping off the rib ends just where
it is least convenient and comfortable, the wind never coming from
the “right” direction, the constant worry of it taking off,
breaking pole and or rod or turning inside out and the extra weight
of lugging one around is something I can do without.
Instead I rely on a
decent waterproof suit.
Footwear
I have used SkeeTex
boots since they first appeared on an angler's feet. The originals
were bright blue because they were made for use in frozen food
warehouses. I still recall my first sight of them at a frosty match
draw on the river Lee in London. Everyone was laughing at the guy
wearing them as they were bright blue and looked ten sizes too big.
He had the last laugh though when he explained that he wasn't even
wearing socks. I think more anglers than me went home realising that
we had just seen a mighty leap forward in Winter angling footwear. I
soon acquired my own pair.
In my opinion those
early blue models were slightly superior to the current ones we now
get. I don't remember ever having cold feet in them. Today, on
really cold days I do find my toes get slightly chilly. Though this
could be because some forty years have elapsed and perhaps my
circulation isn't what it was when I was in my twenties. I am not
sure if the inner sole is as good an insulator as the originals. But
For 99% of the time they keep me comfortable.
Some find them
difficult to walk in, I don't. You just have to adapt.
One thing though is
that you don't need thick socks with them, it is better for your toes
to have wiggle room. And always remove the liners and dry them when you get home. Remove the insole as well to allow the boot to dry. Nothing shortens the life of the liner quicker than leaving them damp. And replacements are not cheap.
The outdoor Winter
sportsman is though now well catered for and there are several
excellent (by all reports) boots available. None will be cheap but
will pay for themselves if you are able to fish more effectively
because your feet are not cold.
One last mention about
footwear. I have heard excellent reports about socks called
Sealskinz. They are said to be waterproof and made for climbers,
runners and cyclists. Like all top grade gear they appear not to be
cheap (£40+) but if effective may well be worth the initial outlay.
A pair may just be on my Christmas list this year (2018). I am told
that they come in varying degrees of “warmness”. Not all are
intended to keep the feet warm but dry. Apparently you need to look
for those with a “5” warmth rating.
Trousers
I find that with a
decent bib & brace I get away with just an ordinary pair of jeans
and no need for base layer leggings underneath. I'll mention
outerwear later.
Tops
I layer up in Winter.
Base layer next to the skin is a sweat wicking undershirt of a
man-made fibre. Mine was bought several years ago in the USA
(Michigan), where in the north of the country they know a thing or
two about cold weather. It was, unsurprisingly for me, a cheaper
non-brand name make, probably got from a WalMart store or similar. I
guess that Under Armour is currently seen as the market leader in
such clothing, and have a price tag to match. You may find something
similar on eBay for a lot less. I have just done a quick search and
found a Gildan brand long sleeve sweat wicking tee for just over £7.
I have had Gildan sports socks in the past and they have been
excellent so I personally would trust the brand to produce a decent
base layer tee shirt.
If the weather is not
going to be that cold then I will use a long sleeve “thermal” tee
shirt obtained from Asda for £8, I noticed recently Primark doing
something similar for £5.
The next layer is a tee
shirt or polo shirt. Nothing special.
Depending on the day I
will then wear one of three hoodies. The first is a lightweight long
sleeve tee type. A thin material but enough to add warmth with the
hood up. I have two, both from Lidl and costing around £5. One has
an ordinary neck, the other a roll or cowl type neck that can help to
keep drafts out.
Then I have a normal
jersey hoodie. Thicker and for colder and windy days. Again I use
one of two. One is emblazoned with my club name, Osprey, and on the
back a stylised osprey print. The second is my Maggotdrowning.com
hoodie.
Finally I have really
heavyweight hoodie that again was picked up in the USA. I have not
though seen anything like it in this country.
Outer Layers -
Bottom
Despite the fact that I
like to save money elsewhere I don't think you should necessarily
look to do so with what I consider the most important layer,
certainly not if you need waterproof clothing.
For the bottom half it
is a decent bib & brace. For several years I used an all in one
suit but found that I got too hot on the days when it wasn't so cold
or was sunny. Many years ago my then fishing buddy and myself
discovered the benefits of wearing an all in one suit. But in those
days it wasn't a specialist piece of angling clothing, just a boiler
suit. But the difference even that made was noticeable.
My current B&B is
Korum and I actually have three. One is older and in heavy rain will
let some water through but is otherwise sound and so is used on dry
days. Last year in my local tackle shop I was enquiring about a new
B&B and they mentioned having some Korum ones that they were
knocking out at well below normal price. Reason given was that Korum
was changing its logo and had let some shops have the old stock at a
good price. The price was so good I bought two.
Using the new one only
in the worst weather will prolong its life thus saving money in the
long run.
Some anglers have
discovered that ski salopettes make decent fishing clothes and can be
obtained at a reasonable price from Go Outdoors, and I assume eBay.
I have also noticed reasonably priced sailing salopettes in
Decathlon. So two shops and sports to check out if you are on a
budget.
Again, looking outside
our own branch of the sport can deliver suitable clothing at
affordable prices. Imax make sea fishing clothing and their Thermal
Suit can be had for a price that many of the top coarse brands would
charge for just the bib & brace.
Outer Layers - Coats
I use a variety of
coats depending on the predicted weather.
If it is not going to
be too cold then I have a jacket that has a fleece inner and an outer
nylon shell. The nylon helps keep sleeves dry when unhooking fish in
the net. It doesn't have a hood but as long as it is dry that's not
an issue. It came free with the last pole I bought in 2011 and is
now showing signs of its age. Finding a replacement has been
difficult.
For colder but dry days
I use a TuffStuff Buckland jacket. This was sold by workwear
retailers and mine cost less than £30, half the price of a fishing
branded similar garment. Searching now it looks like it has been
discontinued but I'm sure they will have replaced it with something
similar. Designed obviously for builders and the like working
outside it has a tough outer and quilted lining though again, no
hood. It is as warm as toast. An added benefit is that the front
pockets are huge and easily accessed. Great for keeping handwarmers
in and your hands in when legering. So if you are looking for
inexpensive clothing for fishing in the chillier months then I can
say no more than search the workwear sellers on the internet for
similar jackets.
If it is going to be
wet most of the day then I have a full length, Dryfish coat.
Waterproof, hooded and well padded. It is well worth buying a good
coat of this type. But if you only wear it a few days each year it
will last ages.
If showers are
predicted I take my Summer weight unlined waterproof coat and wear it
when needed over either the fleece or Buckland jacket.
Gloves
I use knitted “woollen”
fingerless gloves. You are never going to keep your hands completely
dry and warm when fishing. I have tried neoprene gloves but for me
they are just too bulky and constricting. The knitted ones keep most
of my hand warm even if they get wet. The point being that they keep
any wind off the skin.
Snood/Balaclava/Hat
It is amazing how just
having something round your neck on really cold days keeps you a lot
warmer. I have a couple of polo neck shirts but for some reason a
snood seems to work better.
I have two. The first
I got is just a tube of fleece that pulls over the head and round the
neck. Cost about £2 off eBay. It has a drawstring that allows one
end to be closed turning it into a hat if necessary. It also has an
added benefit.
There are days when the
wind is coming straight at you and getting under your hood. I don't
like the constriction of tying a hood's drawstring under my chin but
what I have found is that if you pull the hood up and then put the
snood on round your neck over the hoodie it tightens the hood around
the face without the feeling of being tied up.
The second snood is one
that can be used as a balaclava as well as an ordinary snood round
the neck. On really cold days I have found this invaluable. Wearing
both this one and the tube one keeps me snug. The balaclava will go
over my baseball cap and so also help keep that secure when windy.
This type can be had quite cheaply for around £4 either from eBay of
a store like B&M.
Once the cold weather
comes these two live in my carryall and so never forgotten.
As for hats I usually wear just a baseball cap. Main reason is that I find the brightness of the sky, even on a dull day, is distracting. Also if wet the peak keeps the rain off my glasses. But if it is really cold then I may wear a beanie type hat. Of course my hood goes over the top of whatever is on my head.
Flask & Cup
I have had a cheap
Wilkinson's flask for several years. 1 litre and does the job
perfectly. Getting a hot drink inside you on a cold day certainly
helps.
I only ever take hot
water. I know some people prefer tea or coffee, even soup, in their
flask. I have never liked hot drinks from a flask so I take hot
water and Bovril cubes. That way I can make a drink up as I need it.
I prefer Bovril to Oxo as the latter seems to leave a white residue
in the bottom of the cup. The added benefit of using just water is
that if forgotten the flask does not go mouldy inside!
I always pre-warm the
flask before filling with boiling water.
If you do have the
problem of a manky flask then the best solution is to use a denture
tablet or even two to sterilise and clean it out. Just fill with
cold water, add the tablet and leave overnight. And if you get
limescale then pour in some vinegar and top up with water again leave
overnight.
I take three or four
Bovril cubes in a plastic container with a tight fitting lid, along
with the Bovril is a small spoon and a piece of kitchen roll just to
keep things clean. That container goes in a small lunch bag (came
free with a box of cornflakes) and in the bag I also have an
insulated travel mug. Once I have dissolved the Bovril on the
flask's cup I transfer the liquid to the travel mug and top up with
hot water and put the lid on. I find the Bovril dissolves quicker if
crumbled into smaller pieces before adding the water.
As any angler knows you
always get a bite when you open your flask so the travel mug helps
keep the drink hot while you land the fish.
Food
I always have food with
me in Winter. Two sausage rolls and a chocolate bar or two. Nothing
nicer than sausage roll and hot Bovril. And the chocolate is a
welcome treat on a cold day and nice to have when you get back in the
car at the end of the session.
Lap Towel
For years now I have
worn a towel round my waist Winter and Summer so why specifically
mention it in this article? I have found that you can drape the
towel over your hands when pole fishing in order to keep any wind off
and thus they will be warmer. You can also do the same when legering
if your pockets are difficult to access and get hands out of quickly.
I use a small hand or
guest towel to which I sew half a bootlace halfway along each of the
longer sides and that allows me to tie the towel round my waist.
That way you have a double thickness of towel that on busy days can
be reversed or folded over to access a drier layer or on cold days
provides that bit of extra protection to the hands.
Handwarmers
I use the “magic gel”
type. The ones that you snap a metal disk in to activate and boil
for a few minutes to recharge. They are easily cleaned, no mess and
no smell. I carry around six. Each one will last about 45 minutes
and are a welcome comfort on cold days.
Be careful when buying
them though. The smaller ones only last around 20 minutes. Most of
mine are larger and cost around £3 or £5 for two. They come in a
red box and the actual handwarmer has “Magic Gel” printed on it
in white writing on a black background along with the instructions.
Amazon or eBay is where you will find them.
Be careful though, if
left boiling on the stove and the water boils away The Boss is not
happy with the mess it makes of her saucepan!
Finally
Winter fishing, even
with snow on the ground and ice on the water can be rewarding. It is
worth braving the elements for the sense of achievement of having
survived a day in the wild outdoors :-).
Seriously, if you are
going out for a pleasure session and it is cold then look for a spot
where you will be comfortable. That may be with trees providing
shelter from the wind or with the wind at your back, particularly if
you are using an umbrella. Note the position of the sun and where it
will track during the day. Choosing what will be a sunny spot later
will make you a lot warmer than sitting in shade all day.
Also it pays to know
where fish are regularly caught when cold. I know that I can go to
the canal at Foxton near Market Harborough (Wellingborough club
water) and be guaranteed to catch even if I have to break the ice.
No point in going somewhere that I will struggle.
If you are not
comfortable you will not fish well so choosing the right spot can
make a difference.
Having the right
clothing, a flask, food and being prepared for the elements will
ensure you will be as comfortable as possible in poor conditions.
One of the more common
mistakes I see anglers making is not shotting their floats low enough
in the water. While I am not advocating dotting a float down to a
pimple on every occasion I am talking about having the right amount
of float tip showing and not the tip plus half the body, or two
inches of waggler. The “right” amount is an individual choice
given what is happening on any given day but I am willing to bet that many anglers would catch more by adding
a shot or two and reacting to every disappearance.
I probably take things
to extremes at times using size 13 shot and occasionally bristle
grease (lip salve actually), even on carp rigs, to get the “perfect”
amount of bristle showing. There are times though when I will take
shot off in order to have more bristle above the water. But my starting point is always to get the float as low as I can. Indeed sometimes the weight of the bait is enough to sink the float.
Getting the float "dotted down" is a starting point. That may not be to a pimple. I will start a session getting the float as low in the water as I am comfortable with. As the day progresses I may decide to take some shot off. One reason, amongst many, may be that I actually want the bristle to catch any wind and move the float. Or I may dot down to get the float out of the wind. Dragging bottom or suspending a heavy bait are other reasons for having more float showing. But these are conscious decisions made for an angling reason. Not because "that will do".
I fully understand that
there are those with poor eyesight for whom dotting down too far
would make the float invisible. But not everyone I see failing to
shot the float lower in the water can have poor eyes. I also accept that for many just being out fishing is good enough. Catching is a bonus. But I go fishing to catch fish. I want as much action, in a match or on a pleasure session, as I can create. Are the people I see really completely satisfied fishing and not catching?
An obvious question about dotting a float down is
“ Why is this important?”. It has been argued that the
resistance a fish feels when sinking 10mm of a 2mm diameter bristle
cannot be much more than sinking just 5mm. I would agree. The
resistance, while there may be some, is not my main reason for
shotting floats lower in the water. For me it is all about spotting
bites.
Let us say you have
15mm of bristle showing and the float sinks by 3mm. The difference
is negligible and possibly not seen as a bite at all. But with 3mm
showing and the float sinks by three there is no doubt that you would
see that and should react. Even carp, although aggressive feeders,
can give very delicate bites, particularly in Winter. Bites when it is cold are at a premium and thus you should be shotting the float so as not to miss any. And I would rather strike a few times
at false bites than miss the actual bite when it happens. Also you are much more likely to react when the float disappears than when it just dips marginally.
On the subject of
resistance felt by the fish I have seen bites fail to develop when
the fish felt the resistance of trying to pull line above the float
through the surface tension. Hence the reason I sink the line with
backshot, but that is the subject of a separate post. So I
don't think resistance can be totally ignored, particularly so for
thick tipped wagglers.
There is a chance that the
resistance shown by trying to sink too much pole float bristle is
also a reason for the fish to reject the bait. I don't know but why
take the risk when with a little bit of fine tuning we can eliminate
it. Certainly if we talk in terms of straight or even insert
wagglers the resistance felt in trying to sink two inches of float is
considerable – to a fish.
I also hear people say that with more float showing they can read bites. This comment baffles me. Either it is a bite or not. The float has dipped or it hasn't. If it has then I strike. The only real difference I ever notice is that line bites tend to be different to a proper bite. Often I know I have foulhooked a fish just from the bite that I still instinctively reacted to when perhaps I shouldn't.
The float's disappearance is all I want to read. When it does I react.
I think many anglers
are frightened of sinking the float too far in case they cannot then
see it and more importantly, not see a bite. My answer to that is to
experiment, see how far you can sink the float and still see it, and
importantly, see when it isn't there. In this context a thicker
bristle can normally be set much lower in the water than a thinner
one and still be seen. So if you are having difficulty or indeed
have poor eyesight then try using a thicker bristled float and get
that as low in the water as you can.
I also think that some anglers get close to shotting the float "perfectly" then can't be bothered to take the time, put in the effort or use the small shot required to finish the job. I accept that for some with limited dexterity or poor sight using size 11, 12 and 13 shot is difficult. But if you can then I strongly recommend taking the time and making the effort. It is these fine margins that make some anglers stand out from the rest of us. I find the cube shaped Stotz type weights much easier to apply to the line than traditional round shot.
Another thing to
consider for anyone struggling to see a float is whether you are
fishing too far out. People that fish with me regularly know that I
don't, as a rule, fish the pole past 10-11m. I often joke that if I
want to fish longer then I get the leger rod out. My eyesight is
fine (I have an excellent optician), it is just that I have proved to
myself over time that I don't need to wield 13m+ of pole in order to
catch an acceptable number of fish. And I am talking about both
commercials and canals.
People will ask “What
about poor conditions?”. My answer is to still get the float as
low in the water as possible. The closer the rig is to neutral
buoyancy the less it will be affected by any chop on the water. A
well shotted float will ride through the peaks and troughs unlike an
undershotted one that will bounce up and down. In these conditions I find
it better to use a much heavier float. That way the whole rig will
stay more stable. It also helps if you use as long a bristle as
possible on pole floats. Getting the body deeper in the water will
reduce the surface's effect. It is worth investing in a few
“windbeater” type floats such as the DT Windbeaters* so as to get
the body of the float below the wave base and thus into more stable
water. They may not see much use but well worth having for those
really poor days.
If you want to understand why then research “Wave Base”. But simply on most lakes with wind created waves water will only be rising and falling in the top few inches. Below that it will be still. The depth of the wave base is roughly half the wavelength. So if the float body is below the wave base it will be stable.
DT Windbeaters.
May look odd but this type of float, dotted down in a high wind/choppy surface, works well.
I'm sure everyone is
familiar with the diagrams that are shown in magazines of shotting
patterns. I get slightly annoyed that it is made to look so simple.
Not that the pattern is wrong but that there is never any mention of
fine tuning or trimming the shotting to get the float set as the
angler wants. It is impossible that the precise shotting pattern demonstrated
makes the float sit perfectly. In my experience even a float set
perfectly today will require some tinkering the next time the rig is
used. I am, in the main, talking pole floats with relatively fine
bristles.
The way I shot my
floats is to get the pattern of shot I want at the business end,
towards the hooklength. As I use a limited range of floats I do know
precisely what shot to add when making the rig so that the float,
straight out of the box, will sit almost perfectly but probably
needing a little extra shot added for me to be happy. These extra
shot are normally added just below the float. This is for three
reasons. The first is that they can be used as a tell-tale against
the float moving. The second is that they will not interfere with
the shotting pattern lower down the line and third they are easy to
identify should I want to remove them later.
With stick float fishing it can pay to almost or actually overshot the float. That way you have to hold it back to prevent it sinking. This slows the bait right down and can be a devastating method on the right day.
Then, if you are dragging line on the bottom you may need the float undershotted.
When fishing a waggler on a river and dragging bottom you will need more float showing to prevent the float from constantly being dragged under. But you can still shot the float so that it just manages to keep progressing through the swim but show delicate bites.
* I have no commercial connection with DT Floats. I know Dean but that is as far as my association goes. I thank Dean for allowing me to use the picture from his website http://www.dt-floats.co.uk
I call any shot placed
on the line between float and pole tip “backshot”. Some will
differentiate between shot that do different functions, more about
which I will explain later, and refer to trimming shot in addition to
backshot. I prefer to keep things simple. So all shot above the
float are, to me, backshot.
Background
I now backshot all my
pole rigs. Doesn't matter if they are for carp or silvers, deep
swims or shallow margins. I feel the benefits mean I catch more
fish.
As I see it there are
three main reasons for backshotting your rigs. First is that the
line can be sunk and remain under the surface thus reducing any
effects a wind may have on the float and rig. This means the rig is
doing what you want, not what the wind wants to do to it. You have
much better control of the float and rig
Second, bites,
particularly from silvers such as canal roach, can be improved by the
line above the float not sitting on the surface tension. This was
demonstrated to me several years ago when fishing a Lincolnshire
drain for small roach on a still, bright sunshine Summer's day. My
float had a fine bristle, dotted down but with no backshot the line
was sitting clearly on the surface. I could see the bristle dipping
slightly but not going under as a "proper" bite. I decided to sink the line with a
backshot and suddenly what had been tentative dips of the float now
became positive disappearances and I started to catch much quicker.
The fish could obviously feel the pressure required for them to not
only sink the float but also break the line through the surface
tension and rejected the bait. That marked the time I started to backshot all my rigs.
Backshotting can also
help to speed up the time between the float disappearing and you
hitting the bite. More of that later as I show you the various uses.
Basic Set-up
When making up rigs, be
they silvers or carp, I incorporate two shot above the float. These
are a No.11 and a No.9. The 11 is closest to the float, the 9
towards the pole tip. Once I have the rig set at the correct depth I will slide the No.11 down so that it sits at a point that is the same distance from the eye as the tip of the float.
This shot will, most of the time, register on the float though I have
found not as much as the same shot being placed under the float. The
difference is minimal but I am convinced real.
The No.9 will sit
anywhere from right under the pole tip to a couple of inches above
the No.11 and this will be dictated by the weather conditions and how
the fish are biting on any given day. Its one of those variables
that you cannot make a definitive ruling on. But at no time will I
allow the No.9 to register on the float as it will make it sink.
Why No.11 and 9? I feel the No.11 is a good compromise in that it will not unbalance the float but is heavy enough to keep the line sunk. The No.9 is just a personal choice thing and has no logic, its just what I use. It could just as well be a No.8 though I think a No.10 would be too small. If conditions are poor I may substitute a No.8 for or add it to the No.9.
Most of the time the
No.9 will be held just below the water surface, particularly as the
rig settles in the water. The No.9 will sink the line below the pole
tip and then encourage the No.11 and line closest to the float to do
the same. The following picture shows what I mean
You can see that the No.11 is hanging from the float and thus will contribute to the shotting load while the No.9 is hanging from the pole tip and having no effect on the float.
If bites are being missed because the angler thinks they are striking too late then the No.9 can be suspended above the float and if necessary moved closer so as to tighten the line between pole and float as per the following picture.
Note the slack line between the two shot so the No.11 is still adding to the float's loading. We can though tighten the line to the float even more. Useful if fishing for species like F1 carp.
Sliding the No.11 up to sit just below the No.9 increases the weight of this bulk and that can be helpful in a light breeze by keeping the line hanging as straight down as possible. In stronger winds more shot can be added such as a No.8. This is placed just above the No.9 so if later it is not needed it can be slid up to the pole tip.
Ideally you want the bulk and float bristle close together so you can watch both at the same time. The bristle to spot bites and the bulk to ensure you are keeping the line as tight as possible without pulling the float out of the water.
By sliding the No.11 up the line it will no longer be registering on the float and shot may need to be added under the float to compensate.
If it is difficult to see the 9 & 11 bulk then adding a No.8 will help by increasing the size of the bulk. Painting the shot with TippEx or similar can also aid visibility.
A variation of this set-up is to use three No.8 shot strung out from pole to float. The general idea is the same, to tighten the line between the two.
Fine Adjustments
I tend to be ultra demanding or critical about the amount of bristle showing above the water. Sometimes either conditions change during the day or different baits will make a float settle to a different level. One way of getting the float sitting as I want is to use some very small shot, typically No.12 or 13 between the two backshot. These can be slid up or down the line depending on whether the float needs more or less weight.
In the picture you will see four No.12 shot have been incorporated into the backshotting pattern. Some will refer to these as trimming shot.
You can slide as many or as few up/down the line as the situation demands.
The original principle is still the same that the shot close to the float will register on it while those under the pole tip will not.
These smaller shot can also be used to shot very fine bristles where, for example, a No.12 is too much and a No.13 too little when added below the float. Adding a No12 as extra backshot close to the float seems to register slightly less than when on the line below the float.
Windy!
Backshotting, as I have said can be used to control the float in a breeze but what happens when we are trying to fish in a high wind? A No.9, even a No.8 is not going to help at times. In poor conditions don't be afraid to increase the weight by using a No.6 or even larger.
You will see that the No.11 has been dispensed with and the large shot replaces the No.9. What this does is create a shock absorber between pole and float. If the pole gets blown around then instead of jerking the float the No.6 will rise and fall in the water and dampen some of the extreme movement. It may even help to move the shot closer to the pole tip and place the tip underwater. Experiment in poor conditions to see what works best for you on the day given the poor conditions.
This big shot will probably work best with more line than normal between pole and float. Don't be afraid to have three even four foot of line above the float. Sacrificing the speed of transferring the strike to the float and then hook will be offset by getting more bites in the first place.
First up let me say
that I am of the opinion that you cannot fish a pole effectively from
a chair. Perhaps because I have only ever used a basket or seat box
I just think anyone using a pole while sitting in a chair looks
awkward.
Getting Comfortable
If you are going to
fish the pole well then like most methods of fishing you have to be
comfortable and have everything to hand.
The accepted wisdom is that your seatbox and footplate if you have one should be set at a height that causes your knees to be at a ninety degree angle when sitting straight. I actually prefer to have my box slightly higher than that so my knees are slightly more than ninety degrees.
The following picture was taken in France. I used to take an old box that fit in the car better than my usual one.
This box has no legs but is an ideal height for me.
Note the vertical upper right arm.
Upright back, relaxed position and
not having to hold the pole with the left hand.
This picture is my usual set-up. Being right handed the pole is on my right, side tray, topkits and landing net left.
Everything I should need is to hand or in the box.
Topkits
I
normally sort out my topkits and get them set on the roost before
setting up the pole. The less I need to walk about after setting up
the pole the less likely I am to trip over it, tread on it or
otherwise cause damage.
Assembling the Pole
Once
you have box and side tray set then we need to set up the pole
roller(s). Do this before you assemble the pole. Position the
rollers in approximately the correct position. To start with have
the front roller roughly three yards behind you and the rear
one maybe five yards further back.
One
of the first things to decide is what length of pole you are going to
use. I can't tell you as obviously every venue, every day may be
different. But as I said in an earlier section, do not try and fish
the pole too long to start with. On a commercial venue topkit plus
three sections or at the bottom of the margin slope should see you catch fish and at a length that is
comfortable to start. Similarly on canals, there may be no need to
reach the far bank at first. Rivers are a law unto themselves and
you will need to adapt to the one you are fishing. But even on
rivers it is often not necessary to go long to catch.
Take
the pole and lay the sections you are going to use where you can
reach them easily while on your box. I either lay them on the carryall that sits behind me or on the nearest roller. And trust me it is safer to assemble the pole while sitting. You can assemble the pole in
one of two ways. You can take the number four section then add the
five, six and seven etc. while extending the pole over the water.
Then when complete ship back onto the rollers. Alternatively work
from the butt end and add the sections in reverse order while pushing
the pole back on the rollers. I have no favourite and adopt
whichever method seems right given the day and the bank I am on, or
perhaps how I am feeling.
Never try and lift the length of pole from the thin end. You will break a section. Manoeuver the pole with most of its weight on the roller or with the butt on the ground.
At the end of the day I put the pole away first, normally without having to get off my box. Again this reduces the chance of accidents.
Setting The Rollers
The following film
shows how your rollers should be positioned for achieving a smooth
process of shipping in and out. The one one thing we want to avoid
is any jerky or sudden movements. This can lead to spilled bait,
tangled rigs and in extreme cases a broken section.
Obviously you may have
to reach a compromise regarding the exact position of the rollers if
you are going to be fishing the pole at different lengths during the
day. If that is the case then I would have them closer to you than
perfect for the longest length. And if the difference in lengths is
going to be great, say five metres and sixteen metres then I would
strongly recommend getting a third roller.
But as this is a
beginner's guide I will assume for now that you will be using a
shorter pole and probably not complicating matters by fishing
multiple lengths at first.
If using a longer pole than the space behind allows for the whole thing to be shipped back in one length you will have to break the pole down at least twice when shipping in.
I will also mention that the pole I was using in the video is the Maver Abyss X. In section two of this guide I said that you don't have to spend big to start pole fishing. This pole cost me less than £50. It was the only pole I used that day and it accounted for around 50lb of fish ranging from roach to 8lb carp, skimmers and crucians.
Setting Up The Rig
By now hopefully you
will be sitting on your box with a topkit or two beside you and a
pole sitting within easy reach on its rollers. Now is the time to
attach a chosen rig to your topkit, add a hooklength and then attach
a plummet.
To me a plummet is THE
most essential tool in the pole angler's box after the pole and rigs
themselves. To try and fish a pole without a plummet is foolish.
You have wasted your money buying a pole if you have not spent the
pennies required to get a plummet or two.
To me the starting point for the day is always to plumb up at full depth with a small amount of float showing with the plummet on the bottom. With that depth known you can then deviate from that.
Hopefully you will know the approximate depth of the water you are
fishing and have chosen a rig that is sufficiently long. Swing the
plummet out and mount the topkit on the pole. When doing this always
hold the topkit steady and insert the number four section of the pole
into the kit. Push it home firmly but not jammed on tight. The
reason for keeping the topkit steady and manoeuvring the pole is that
moving the topkit around can induce tangles.
Ship the pole out to
your desired length or to the spot you want to target. Lower the rig
in vertically and note where the float is when the plummet is on the
bottom. Lift and lower the rig two or three times so you get a feel
for the depth and how far out from dead depth the float is. Ship in
and adjust the float as required and ship out and try again.
Take your time over
this process, it can and will have an impact on your whole day's
fishing. Get it right at the start and you will reap the rewards
later. Ideally I will look to have the whole bristle showing when the plummet is on the bottom. Some advocate the bristle and body should be visible. The important thing is that you know that you have the bait on the bottom once the float has been shotted correctly and settled.
Once you are happy with
the amount of float showing then try plumbing up left, right, further
and nearer to establish in your mind's eye what the profile of the
swim is like. You may find a slope, a drop off or even a snag you
can't see. I find canals can be a nightmare sometimes with sunken
branches and the like. You may also want to find a second or even third spot where the depth is the same so that you can feed and fish these different spots during the day as bites may slow on your original one. My aim is that these other spots should be at least two yards away from the first.
Once you have settled on a spot then note two things. Line the spot up with a far bank marker, or as I do sometimes a reflection of the far bank. Also note the length of pole. You don't have to fish with the pole at just the full length of a particular section. If necessary you can hold the pole with any amount of the final section behind your elbow. If I do this I will mark the pole with TippEx or tape at the point where my right thumb rests. On some pole sections I have some tape half way along permanently and this too can be used to set a length. I just have to remember where the tape is in relation to my right hand or arm.
You should now have a
rig with the float set so that the hook is just on the bottom with
the bristle on the surface. Now it is time to cut the rig down to
the length you are going to fish with.
Beginners often ask how
much line should be between pole and float. Like other aspects of
fishing, there is no hard and fast rule. The venue (including venue
rules), conditions and actual spot being fished will have an impact
on this decision. Generally though if we are talking a lake then a
good starting point is to have twelve to fifteen inches of line above
the float. On a river possibly more and less on a canal.
On a day with a strong
wind blowing you will probably want more line, fishing the margins
close in you may have as little as four inches. If you plan to fish
an appreciable amount overdepth then allow for this when reducing the
length of the rig.
I would now remove the
plummet and get my shotting correct. Remember that shotting the rig
at home I advised leaving a little more float showing than you will
have ultimately when fishing. Now is the time to add shot until you
have the amount of bristle showing that is comfortable to see but
small enough to detect bites.
At this time I would
also mark the topkit with the depth. We do this so that if we move
the float by design or accident during the day we can return to this
dead depth point if we wish. The hook is hooked to the bottom of the
topkit and the rig will now sit alongside it with a small amount of
elastic stretched out of the tip. The elastic will be stretching the
line by a couple of inches so marking the depth with the rig under
tension will give us a false reading. Grasp the connector and pull a
little more elastic from the pole to the point where the rig is still
alongside the topkit but not under tension. You should see the float
creep towards the butt as you do this. Using a marker such as
TippEx, Snopake or a chinagraph pencil mark the point on the topkit
where the tip of the bristle sits. You now have a reference point
for the rest of the day. This can also be transferred to other
topkits without the need to plumb up each rig separately if you wish
by holding the kits alongside and marking at the same point.
If you wish to fish,
say six inches, overdepth then slide the float up the line six inches
and re-trim the length of line above if required.
Hopefully now we have a
rig that is at the correct depth, length, correctly shotted and so we are
ready to fish.
Feeding
I have written a blog
on feeding and could probably write a book and still not be able to
tell people exactly how, what, where, when to feed. Probably the
most important skill in fishing is feeding. Fishing the pole to me
is about accuracy and finesse, and so it is with feeding with a pole.
Feeding with a pole can be as precise as you wish using a pole cup
or tosspot. Amounts and position can be controlled to the ultimate
degree. And of course this is where noting a far bank marker and length of pole are important.
Apart from the obvious
of feeding with a pot on the pole you can also feed by hand and with
a catapult. Each method will have its day. What you decide to do is
up to you. But, before feeding you really need to understand what it
is you are trying to achieve with the method of feeding, the bait you
are feeding and the amount.
I tend to feed most often
with a pot mounted on the pole be it a cupping kit or tosspot. I
just feel that dropping the bait on the same, small spot concentrates
the fish where I want them. But there are days when the catapult or by
hand come into play.
I will nearly always
feed a pole line before fishing it. Sometimes straight after feeding
and on other days I may put a leger out for a few minutes to let the
fish find and settle on the feed.
Hopefully this initial
feed will lead to a few fish and then the question comes of when, and
how much, to re-feed. I have to dodge the question and say it really
is up to you. Sometimes when fishing a commercial lake for example
it may be prudent to take a few fish before re-feeding, but other days
may see you needing to feed after every fish. These are skills not
restricted to pole fishing and so I will leave the subject there.
One tip for emptying a tosspot of bait like pellets that may have been tamped down. I have found that if you sink the pot and wait a few seconds for it to fill with water then turn it over the contents come out with little encouragement. There is a demonstration in the following video.
Getting The Rig In
The Water
OK, now it really is
time to get fishing. We have plumbed up, shotted our float, fed the
swim and put bait on the hook. Swing the baited rig out into the
water so that the rig lands in a line. Dropping it in in a heap will
cause tangles. Mount the topkit on the pole and ship out and get
comfortable.
When introducing the
rig to the spot you are going to fish you have a couple of options on
how to do this. You can lay the rig out so it is in a straight line
from the pole tip and let it swing down like a pendulum so the float
eventually settles. You can hold the pole rigid so the float
gradually settles in the one spot or you can let the float drift in
the direction the rig was laid in until it cocks and settles down.
You have the option to
lay the rig out in any direction you please. Left, right, away from
you or towards you. And it may sound illogical but the direction may
just affect whether you get a bite or at least how quickly a bite may
materialise. If the water is moving you can lay out with the flow or
against, if there is a slope you may wish to have the rig settle so
it drags the hooklength up the slope. All I can advise is to
experiment and see if one method outscores another.
Similarly you can lower
the rig in vertically. You hold the rig out of the water over your
chosen spot then slowly lower so that the bait enters the water
followed by the rest of the rig. Again, doing this can produce bites
that the pendulum method may not induce. There is no way of telling
which is correct on the day.
You can also combine the two techniques. Lay the rig out but holed the float out of the water by a few inches in line with your far bank marker. After a few seconds the rig will have settled below the float and now you can lower the float and let the bait have as natural a fall as possible for those last few inches. This can produce a bite immediately so always be ready to strike.
What Next
If you have added
backshot then you need to encourage the line between the tip and
float to sink. You may have to hold the pole tip to one side of the
float and let the heavier shot sink taking the line and lighter shot
under. You can then hold the pole wherever is comfortable waiting
for the bite. This could be left or
right of the float, upstream or down if on a river. You can hold the
float still or let it move with the flow or tow. As you get used to
pole fishing you will discover what is right for youb and the fish on the day.
Handling the Pole and Using a Catapult
The following video shows some of the things I have been talking about. It runs for around eight minutes.
Bite!
The float disappears!
Glory-be our first bite on the pole. Smartly lift the pole or move
it sideways away from the float to set the hook. This movement does
not have to be violent. Even with five metres of pole in hand a
small movement at your end will result in a large movement at the
pole tip.
I find that the shorter
the line between pole and float the less violently I strike.
There is certainly no
need to have the whole rig come flying out of the water if you don't
hook the fish. You should be aiming to have the float come out of
the water and not much more of the rig.
If you are fishing under overhanging vegetation then you will have to strike sideways or even by pulling the pole towards you.
Playtime
Having hooked the fish
there is no need to rush anything. Take your time and let the
elastic do its job. First thing to do is assess the size of the
fish. If small and using light elastic you can start to ship backwards allowing the elastic
to take care of playing the fish and bringing it to within swinging
or netting distance. Once shipped back to the point where you can
grasp the butt of the toopkit remove it, again by removing the pole
form the kit not the other way round. You can now net the fish or
swing it to hand if small enough.
Larger fish will
require some playing.
As long as you have
chosen the right strength of line and appropriate elastic you should
have no problem with larger fish. Let the elastic do its work. If
you are used to playing a fish on rod & line then the pole is not
much different. Side strain is still your friend in trying to turn a
larger fish. But instead of reeling in we will be shipping the pole
back and eventually grasping the topkit.
This is when having
correctly positioned pole rollers helps. You should be able to ship
back and land on the front roller without having to look at it. Then
gradually ship back until you can grip the butt of the topkit. As
with mounting the kit, remove the pole from the kit, not the kit from
the pole. And never, no matter what, point the pole at the fish. A
large fish will pull the topkit or even more sections from the pole.
And I have seen people have to go swimming to retrieve sections of
pole lost in this fashion. With a bend in the pole the sections will
lock in place.
With a fish that is
determined to run try dipping the pole tip underwater, even by a
couple of feet. This technique is very effective when playing fish
on the topkit. I believe that the fish is comfortable on the bottom
and as long as you are not trying to pull it up in the water it will
succumb to the elastic's pressure. As the fish nears you then raise
the topkit and if necessary let the fish run again and bury the tip
under the surface again. Repeat this a few times and the fish will
tire and be ready to net.
There is no need to
rush a fish to the net. Ignore what you have seen experienced pole
anglers do and take your time.
I will also mention that you don't just lock your arm and wrist solidly when playing fish. I advocate what I call a soft wrist and elbow. Perhaps this goes back to my days of fishing rod & line. If I am playing a fish, and it need not be large, I will use the wrist and elbow to let the pole tip follow a lunging fish. This may mean that no more elastic is taken from the pole but the tip just travels a with the fish and towards the surface. This is one way I manage to land small fish on heavy elastics. Obviously if a larger fish is determined to run then I will hold steady and let the elastic do its work and use the technique I described above of burying the tip underwater.
Lift & Drop or
Leave Alone
Pole anglers tend to
fall into two camps. Those that will lift a couple of feet and lower
the rig back in if they have not had a bite after a few minutes and
those that believe the bait should be left for the fish to find.
Where you end up in this debate will depend on your own thoughts and
experience.
Final Thoughts
I think I have just
about completed my mission. Just a couple of things that didn't seem
to fit elsewhere.
Lubricating elastic –
I just get water into the topkit and let that do the lubricating.
You can use a proprietary lubricant or diluted hair conditioner. But
I believe these just wash out on a busy day.
Changing Elastic - Check your elastic for wear regularly. You will find that eventually the elastic at the tip of the pole will start to wear. There is no point in risking lost fish for a couple of pounds worth of elastic. So when you notice the elastic deteriorating either change the whole thing or unwind the spare elastic you may have stored on the winder bung and re-fit the connector on a sound piece of elastic.
Pole care – Take care
of your pole. It should be washed inside and out with warm, soapy
water every now and again. Take care not to get grit or dirt in the
joints. Apart from that don't jerk it around, sudden shocks will
break sections. And don't store it wet. It won't harm the pole but
it will be unpleasant next time you come to use it.
And that I think is it.
Enjoy your pole fishing and if you have any questions myself and the
other folks on maggotdrowning.com will be happy to supply answers.
But be prepared for a range of opinions.
I will leave you with one of my favourite catch shots
Remember fishing should be fun. Tight lines and stretched elastic.